|
|
Crazy Daisy Productions Audio Tips and Hints Blog |
Entry February 18, 2021:
"I want my track to play on digital streaming platforms, but come out sounding just as good as analog vinyl. Is that possible?
That question hearkens back to the ongoing feud between digital progressives and analog purists. However, Crazy Daisy Productions lead engineer Erik Veach addresses the age old question "Could Digital Audio Ever Outperform Analog" from a new angle in this Bandzoogle article post -
Could Digital Audio Ever Outperform Analog?
Entry October 24, 2019:
"Should I take the time to record multiple separate takes and do real doubling of vocals, or just use a vocal doubling plugin?
Crazy Daisy Productions lead engineer Erik Veach provides helpful recommendations regarding both options in this article on Bandzoogle -
Vocal doubling: record it for real or use plug-in effects?
Entry October 24, 2019:
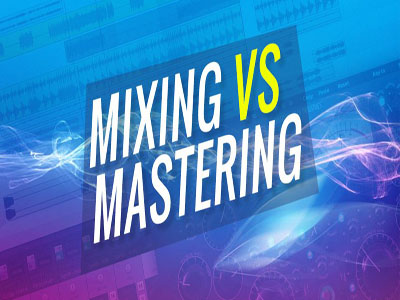
"What's the difference between mixing and mastering, and how do I know which one I need?"
There's lots of great info available to assist with answering this question. Rather than repeating everything over again, we'll provide the following links to some helpful pages:"Do I Need Mixing or Mastering? What's the Difference?" article on Soundfly by Crazy Daisy Productions engineer, Erik Veach -

flypaper.soundfly.com/produce/do-i-need-mixing-or-mastering-for-my-music-whats-the-difference
"Mixing vs Mastering - What are the Differences?" article on ProducerSpot by Crazy Daisy Productions engineer, Erik Veach -
producerspot.com/mixing-vs-mastering-what-are-the-differences
Crazy Daisy Productions Mixing OR Mastering page explains the basic difference between them and offers details on our various levels of audio services that can be of assistance for both - www.crazymastering.com/mixing-or-mastering.html
Entry September 17, 2019:
"What's the best way to separate my mix into stems for touch-up mixing, remixing, or stems mastering?"
Stem tracks are a great way to encapsulate your full mix into a few well-organized tracks containing a limited collection of related sounds. They're often used to allow easy remixing, touch-ups to the final mix, or stems mastering of a song.If you decide you want to divide your song into stems, it's a good idea to either write out a list of all your individual tracks within the mix, or even create a spreadsheet of them. This can help you make sure all tracks are accounted for, and not repeated in any other stem.
Start by deciding how you should break up your song. What are its major components? Drums? Synth sounds? Stringed instruments? Lead vocals? Backing vocals? Define what sound categories are within your song. Also, consider the potential future use of the stems. DJ remixes? Karaoke remix? Final stems mastering? Are the proper elements separated out and/or combined together as would be needed for those uses? Once you've identified all the major sound components and any special separated or grouped parts you should have for the expected uses for the song, these can be considered the "stems" that you will want to create for your song. It can potentially be every individual track within the mix, but most often it's fewer tracks as typically certain tracks are grouped together with others into some of the stems. Now go through your written list or spreadsheet of all the individual tracks within the song and begin to assign each to one, and only one, of the stems you determined you need to have for this song.
To create each stem, solo only those specific tracks in your mix that you identified are part of that stem and bounce/export the entire length of the song as a stereo audio file, including all effects sends associated with the selected tracks. Repeat this until you have finished producing all the stems you identified for your song. Once you have finished making all your stems, you can recreate the entire song by importing these stems into a new song mix project session to verify that everything sounds accurate. It's also a good idea to export/bounce a copy of the full song mix as well, as a reference for how the entire combined song should sound.
For more helpful advice on creating stems for your mix, check out this article on Soundfly by Crazy Daisy Productions engineer, Erik Veach.
The Art of Creating Audio Stems of Your Tracks.
flypaper.soundfly.com/produce/the-art-of-creating-audio-stems-of-your-tracks
Entry March 19, 2019:
"If I don't have the mix for my song any more and I would like to have the vocal levels raised, can mastering help?"
Often times, yes vocal levels can be raised in mastering. How can this be done when we're simply using a single audio file instead of all the separate individual mix tracks? Generally speaking it's through a combination of EQ, dynamics, and imaging work that certain aspects of a song can be brought forward more, or set back more, to create a better balance of sound. This is one of the functions of mastering and it can be used to help improve the sound balance to some degree even without having to return to the mix. However, it does have limitations and could end up causing unwanted side effects if pushed too strongly in any one direction. So the answer is yes, you can adjust levels of a particular sound within your song with mastering alone, but only up to a certain point, beyond which it could affect the sound in undesirable ways. Obviously it's best to attend to your individual track sound levels in the mix prior to mastering, but if you've lost your original mix session files it's possible mastering alone may still be sufficient to massage things into place well enough to create solid sounding results.Entry February 22, 2018:
"I exported my mix as a stereo wav file, but it doesn't have the same wide stereo feeling like other songs I listen to do. What did I do wrong? "
First, we need to identify that the term "stereo" really has two meanings in the context of audio. The term "stereophonic", from which we get the shortened word "stereo", is used to mean sound that can be spatially identified as coming from more than one location. We have stereophonic hearing because we have two ears separated on either side of our head, which helps us determine where a sound is coming from that we hear. In sound reproduction we use multiple sound sources in order to divide up the audio signal so that it can appear to come from different locations in a similar manner. The second use of the term "stereo" is specific to sound playback and is used to identify a sound source utilizing two loudspeakers, or "channels" as they are often referred. This is the minimum number of loudspeakers required to produce stereophonic results. Other options for sound sources would be "mono", or one channel of sound, and "surround", which utilizes multiple channels of sound that are placed such that they surround the listener on all sides. So, to summarize these definitions, you can use stereo sound (i.e. two speakers) to produce stereophonic sound (i.e. spatially separated sound sources). Now understanding this definition it should be easy to realize that it's possible to have "stereo sound output" which may not be producing "stereophonic sound results". An example of this would be if you played the exact same sound out of both channels (speakers). In this case you don't have stereophonic sound - that feeling of width and depth. Instead what you really have is just a louder version of a mono sound, as if you were playing a single speaker but at a slightly higher volume. In that case all the sound will seem to be coming from the same single source. This is why it's possible to create a "stereo wav file", but have the results feel like they're in mono. In order to get a stereophonic feel from the sound of your mixes you need to utilize either panning for tracks within your mix to literally shift them towards one channel (speaker) or the other, or you need to use stereo effects, which are sound effects such as reverb, chorus, echoes, etc. that produce different sounding results in either channel (speaker), or you need to use some stereo widening effects, which are special audio effects intended specifically to alter the sound delivered to each channel to invoke a greater sense of stereophonic width in the sound of your mix. After applying some combination of these various stereo enhancing adjustments to your mix you need to export your final mixdown as a "stereo" file in order to ensure that the stereophonic sound you've worked to create in your mix is carried through into a stereo sound formatted audio file.Entry November 21, 2017:
"If I have an MP3 or WAV file from an old recording is it possible to have it remixed to give it a more modern sound or update/improve the sound? "
Since a single audio file has all its sound contents blended together already it's not going to be possible to do any more mixing work on it as the individual constituent audio tracks within the file are no longer accessible in a WAV or MP3 audio file. However, there are still a few options available to you. First, you can see if possibly the original studio where it was recorded may have the original audio tracks or mix session saved in their archived files, in which case you can then have that remixed for a new sound. Second, even though a single audio file doesn't have multiple parts to "remix", it could still be "remastered". Remastering it might help update the EQ, dynamics, imaging, and other adjustments that could give it a more updated sound or improve the quality of the original mixed sound. Finally, one possibility to consider if you're wanting to update a mix is that you can still layer additional sounds on top of your original audio file in order to add extra vocals or instrumentation for a fuller or more produced sound than you might have originally had. These new added tracks would then need to be mixed together with the original audio track to create a new mix, as well as mastered for proper final overall EQ, levels, and stereo image.
Entry April 4, 2017:
"If one of my songs is at a good volume level I like prior to mastering can I ask to have all the other songs on my album mastered to match that level?"
Yes, you can. But also keep in mind that there's a lot more to mastering than just setting volume levels. Mastering also includes EQ balancing to smooth out inconsistencies and ensure full range sound impact and clarity, stereo imaging work to balance left and right sound levels and open up the soundstage width and depth, peak level and dynamic range checking to make sure your overall volume level is appropriate for a variety of different playback formats, subtle audio effects such as ambience and dithering to give your songs more of a polished and blended sound, plus final quality control error checking to double-check for any pops, clicks, clipping, mix problems, or other technical audio issues. By providing all your songs for mastering, including any you feel sound good as-is, you give your mastering engineer a chance to help further improve upon the sound and bring all songs up to the same sound quality level, not just the same volume level. However, if you are especially happy with a particular aspect of one or more your songs as they sound prior to mastering, such as a volume level setting or vocal presence or bass thump, be sure to let your mastering engineer know so he can give special attention to maintaining or improving upon those particular details as part of the overall mastering process.Entry January 7, 2017:
"What is sidechaining compression and how can I use it in my mixes?"
Sidechaining compression refers to connecting a compressor effect to one or more audio tracks in your mix to act as sort of activator for the compressor. In this way you can have compression kick in lightly or strongly based on the sound presence and level of the activating tracks that connect to it. Most commonly it's used as either a way to have certain elements that appear lightly in a mix cut through a heavier set of backing instruments or to use to get the pumping feeling in bass in many EDM tracks. Typically it is used by adding a compressor plugin to an individual or group track that you want to have effected by the plugin and then connect the tracks you want to activate the compressor to it via a bus. The method to do this varies by workstation (DAW) and compressor. Most will include some basic documentation on how to set them up to use sidechaining. Sidechaining can be a useful tool, but due to the high sensitivity of many compressors and all the possible interactions between the compressed track and activating tracks you will likely need to do quite a bit of tweaking to get just the right sound for each specific situation.Entry September 9, 2016:
"Why don't my song titles appear when I play my tracks in iTunes?"
There are two different ways in which song metadata is encoded directly to the file media: ID Tags and CD TEXT encoding. In addition, song data is also maintained by the Gracenote online music database to display for Audio CDs and uncompressed CD quality audio files.ID Tags are the metadata typically associated with MP3, WMA, and M4A files, as well as other compressed digital audio formats. If you play one of these file types on your audio player it should display all the pertinent information: song title, artist name, etcetera. If you're playing one of these file types and the information is not displayed, that means the ID Tag metadata was probably never encoded to the file. Your mastering facility should have added this encoding to your mastered tracks. (Crazy Daisy Mastering always encodes all ID Tag metadata to the digital file versions of the mastered tracks that we provide our clients.) However, you can also add and update ID Tag metadata in your audio files yourself in iTunes using the 'Get Info' option for each track listed.
Tracks played directly from an Audio CD do not use the ID Tag metadata format, so this information can't be displayed that way. These audio file types actually rely on two different methods for metadata display: CD TEXT encoding and Gracenote online database access. When you place an Audio CD in a home stereo CD/DVD/Blu-ray player or car CD player that is enabled to show track details it is reading the CD TEXT encoded metadata that was written directly to the CD during the creation of the disc. This is usually handled by your mastering studio when they make your Master CD copy, or by your CD duplication company if they are creating a Master CD for you from digital tracks you provide. If the CD TEXT information has been added to the CD during disc creation then it will display appropriately on these non-computer based players. For computer and mobile device players that connect to the internet, the only way they display the metadata for an Audio CD is by connecting to the Gracenote online database to find a match in their system to the track on the CD you are playing. If your album and song information have not been added to the Gracenote database then no details will be displayed. Often times your online distributor (if you're selling your tracks online) or CD duplication facility (if you're getting CDs pressed) will add your track details to the Gracenote database as part of their services. But, you can also add this information yourself. Gracenote has a very thorough detailed page on their website describing the process of how to add your track info to their database using iTunes - support.gracenote.com/articles/Public_FAQ/Submit-CD-iTunes-12/.
In summary, to get your track details to display in every situation you need to submit all your audio file details to Gracenote database, add ID Tag metadata to your digital audio file formats, and add CD TEXT information to your Audio CDs.
Get a free online mastering sample from your own song. No obligation to purchase services.
Entry June 7, 2016:
"Do I need to take care of all my track editing, comping, and level automation in my mix session before sending it in to have it professionally mixed?"
Not necessarily. It's certainly helpful to your engineer if you have done editing and comping and level automation ahead of time so that your specific choices and preferences are implemented in the mix, thus leaving the engineer to focus solely on making it sound great for you. However, your engineer is also trained to select appropriate takes for comping tracks and editing together punch-ins, etc. from your recording session. Volume level automation is going to be a natural part of getting a balanced mix, but the engineer may need to correct your automation following appropriate EQ and compression adjustments. So, it's not guaranteed that he/she will utilize all your automation. But, you should certainly pre-apply these (and other) mix adjustments in cases when you have a particular artistic choice in mind in order to help guide your engineer toward that sound goal. In either case be sure to communicate with your engineer whether or not you have done comping/editing/automation ahead of time, or if you would like them to do it for you, and whether you would like your engineer to keep your adjustments as-is or if they have the freedom to alter things if they feel they can get you a better sound.Entry December 18, 2015:
"I tried to double my voice in my mix to get it to sound bigger and fuller, but all it did was make it a little louder. What am I doing wrong?"
This is a common issue. Everyone these days has heard all the recommendations to double your voice in your mix for better vocal presence. Unfortunately not a lot of direction or explanation is provided about vocal doubling. One common way people try to "double" their vocals is to take the single recorded vocal track and copy it to a second track, thereby seemingly "doubling" the vocals. But, this is not true doubling. This is actually referred to as a "multiple", or "mult" for short. When you add multiple copies of the same vocal track it's identical to simply turning up the volume of that one track, so it's not really doubling anything except the amplitude of the waveform. To get true vocal doubling you need to have two (or more) unique vocal recordings of the same exact part that play back at the same time.Even though making a multiple isn't true vocal doubling, many people still use this method and apply different effects to each copy of the vocal in an attempt to try to get similar results to vocal doubling. One common method is to apply different compression and EQ settings to each copy of the vocal, and sometimes even add a slight time offset between them. There are a variety of "doubling" effects plugins available all of which apply some form of this trick to make a single track sound as if it has been doubled.
Doubling can definitely can add a lot of power and depth to a mix, so it's certainly worth taking the time to do it, if you're able. Many of the major vocalists today use this in their mixes to get a huge sound with great impact. Most of them utilize true vocal doubling in their mixes - meaning they will record multiple takes of the exact same vocal part. Then the mix engineer will meticulously edit and level automate each take so that they balance and align cleanly with each other, and apply carefully chosen compression, EQ, and other effects to each vocal track so that they all blend together perfectly to give you a solid coherent sound. If you would like to double your vocals, but aren't sure how to edit and/or mix them for proper cohesion, just do your best to record multiple takes of your vocals that are as close to matching each other as you can get them and let another mixing engineer who has experience with working with doubled vocals do the mixing work for you.
Entry November 3, 2015:
"If my mix sounds almost good enough, but there's still one or two small details I can't quite get right, will mastering alone be able to fix it or do I have to have the whole thing mixed better first before it's mastered?"
That's a hard question to answer as it depends on a lot of factors. In general, though, if you're able to get everything sounding right in your mix except perhaps a few minor level and/or EQ details those things can be addressed in mastering alone. What you can't adjust in mastering alone are effects applied to individual parts, panning of individual parts, and large level and EQ adjustments aimed at specific individual parts within the song. This is because any adjustments made during mastering apply to every single part within the mix as a kind of "blanket" coverage. We're able to make minor adjustments to certain parts within a mix in mastering alone simply because each part tends to have its own particular frequency range where it stands out more than other parts, so adjustments made to that frequency range will result in a more strongly noticable showing on the particular part that occupies that range. The simplest example of this is a kick or bass drum, which lies mostly in the deep bass frequencies. If you feel like you can't get your kick drum quite right in your mix, but everything else sounds good, we can probably address that in mastering alone as we can make EQ and dynamics adjustments (compression and limiting) that address the lowest frequency ranges, which will have the most noticable impact on the kick drum and very little impact on the other elements within the mix. However, as another example, if you feel like you can't get your piano and vocals balanced with each other quite right we most likely will not be able to do this in mastering alone as they both utilize much of the same frequency range and so any mastering EQ adjustment made to attempt to raise or lower the presence of one part will have almost the same identical effect on the other part, effectively eliminating the possibility of adjusting their relative balance to each other. As you can see by these two simple examples, the answer to this question varies greatly with the particulars of the song and the mix itself. But, it is possible for sufficient adjustment to be made in mastering alone if your mix is close enough.
ONLINE MASTERING ORDER ![]()
Entry September 30, 2015:
"How can I reduce or remove the background noise in my recordings?"
The first step, of course, is to try to do your recording somewhere with very little background noise present so you don't have to worry about it. Remember that fans, lights, and electronic devices all produce low amounts of noise that will be picked up by the microphone. Using a cardiod or other directional microphone and appropriate input gain settings on your pre-amp and/or input device can also help reduce the amount of noise picked up in the original recording.If you've done everything you can during recording and you still have noticeable noises in the background of your recordings you have a few options for cleaning up the sound in the mix. First, you can use a Noise Gate, which you can set to turn the volume of that track down or completely off whenever it's levels drop below a certain volume threshhold. This allows you to set it so that the track is only audible when the desired "loud" audio is present and inaudible whenever only the quieter "background" audio is present without the main desired audio. Third, you can use volume level automation to pull the faders for the noisy track up and down in order to quiet any background noise that can be heard between desired audio portions of each track. Third, you can use an EQ Noise Filter. This is a more complex mix adjustment that requires you to know the spectral characteristics of the noise that is occurring behind the desired sound. You can create an EQ filter that is set to specifically remove that exact spectra of frequencies equal to the background noise present in that track. This is most effective when there is a constant noise source behind your desired sound, but can also be used to filter out occassional sounds that appear in the track which are always the same (beeps, bumps, etc.).
Carefully setting up your recording environment is obviously going to give you the cleanest results, but with some careful use of these three additional options you can still get a fairly clean sound in your mix even if there is noise present in your original recordings.
Entry August 17, 2015:
"What is an audio stem and how do I create one?"
An audio stem is a full audio track length audio file (usually a stereo file) that contains one or more similar parts solo'd from within a mix. The most common examples are Vocals and Instruments. It is sometimes useful to split a mix into 2 or more separate audio stems instead of simply exporting/bouncing it as a single combined song.This separation of the mix allows for a variety of additional applications, such as fine-tuning of the clarity and balance of vocals during mastering, added stereo widening of the instrumentation during mastering, providing an instrumental-only version of your track in addition to a vocal+instrumental version of your track, or separate parts to be used by DJs for future remix versions of the track.
Stems are also sometimes used in order to allow for finishing or fine-tuning of a mix at another facility that may not use the same audio workstation software or effects plugins that you used in your original mix work. In this way you can bounce down stereo audio files of every individual track from your mix, or combined groups of similar tracks, including all current level, panning, effects, etc. that you have applied thus far in your mix. They are all bounced down from start to finish of the song so that they are time aligned with each other when inserted into a new audio workstation system for further mixing work. Some example stems could be: drums, bass, guitars, keyboard/piano, strings, horns, sound effects, lead vocals, backing vocals, and many other possibilities.
At Crazy Daisy Productions the most common reasons our clients send us audio stems are for our Vocal+Instrumental Separation Mastering option (2 stems), our Touch-Up Mixing + Mastering option (4-6 stems), and our Full Mixing + Mastering option (any number of stems) for recordings done in systems other than ProTools, Cubase, GarageBand, Logic, or Reaper.
Entry March 9, 2015:
"My mastering studio tells me they encoded all the track title and artist name ID Tags to my digital tracks and also wrote the same information to my Audio Master CD, but when I play the CD in my computer CD player none of the track titles display correctly. Why isn't it working?"
Currently almost every CD-based Audio CD player in existence do not, in fact, read directly from the Audio CD that they are playing, believe it or not. Instead, they try to match up the audio data to information available on one or more internet audio databases, with Gracenote being the most common as it's the one iTunes uses. So, while all the track information may actually be written to your digital tracks and to the Audio Master CD, the Audio player you are using never even bothers to look at it. It sounds crazy, but it's true. They will read encoded ID Tag data from MP3 and other compressed Audio format files (WMA, M4A, etc.), but not from Audio CD's. The track title, artist name, album title, and other "ID Tag" information encoded to an Audio CD is actually referred to as CD TEXT data and is used for display on non-internet based Audio CD players, such as those found in cars and standalone home systems - assuming they're capable of displaying this text information. In order to get your Audio player to display your track data when playing your Audio CD, the information must be available on Gracenote (or other) online database. The easiest ways to make this happen are: a) use an online digital distribution service (CD Baby, TuneCore, etc.) to distribute your digital tracks online and they will submit the information to Gracenote as part of that service or B) use iTunes to import the Audio files from your Audio Master CD and then add all the appropriate track information data in iTunes and submit it yourself through iTunes. The process can take a while, so don't be surprised if it's 2 weeks or longer before you begin to start seeing your track information display automatically when you play your Audio CD.
Entry August 20, 2014:
"What are all the different track variations, such as Acappella, Radio Edit, Performance Track, Stem Track, Instrumental, etc.?"
There are many different versions of an audio track and so you will hear different names for all the different variations. Some of them are more obvious, such as "Instrumental Track", which means simply all vocals removed from the mix. "Acappella Track" would be the mix with only the vocals present and no instruments. Together the Instrumental and Acappella tracks would make up the entire song. There are also other variations, such as a "Radio Edit", which could mean a version of the mix that has been either censored for appropriate language content and/or edited in length to keep it to a more typical radio song length if it's a long song. There is also a "Performance Track", which typically means the lead vocal is removed from the mix so that it can be used similar to a karaoke backing track for live performance by a vocalist; but it's also possible to have many different Performance Track variations where multiple voices or even some instruments have been removed as needed. Stem tracks are portions of the mix with similar elements in them. Some examples might be "drums", "guitars", "strings", "lead vocal", "backing vocal", etc. These are not really variations of the mix, but instead they are sub-mixed portions of the full song. Typically stems are created if there is going to be some final tweaks to the mix as part of the mastering process or if you wish to have aspects of the music mixed+mastered independently in order to provide them as remix material for use later.Entry April 16, 2014:
"I hear people talk about trying to get separation in their mixes. What does this mean?"
By separation usually what people mean is the ability to recognize every element in the mix separately (i.e. you can pick out each voice or instrument independently while listening to the full song). There are times when you want to have certain sounds blend in to a point where you can't identify them independently, but most of the time you do want to hear each aspect of a song's mix just as if we were sitting in the audience and watching it being performed live on stage.In your mixing work you will actually have 2 degrees of potential separation available to each and every element in the song - spatial and tonal. Spatial separation is achieved through use of stereo panning and use of spatializing effects such as reverb, delay, echo, chorus, phasing, and, to some extent, compression. Tonal separation is achieved through various EQ adjustments and frequency filtering. A mix with a good balance and blend of sounds that also adheres to separation techniques which avoid excessive overlapping in both space and frequency between the various elements of the mix will sound very precise and clear and feel as if it's holographic to your ears. It will sound as if you as the listener are an audience of one at a special performance catered just for you.
Entry February 12, 2014:
"Which is the best audio file format - AIFF or WAV?"
Actually, they're the same. Both AIFF and WAV file types are PCM (pulse code modulation) files, meaning they contain a series of numbers in sequence telling your speaker how to move, which in turn reproduces the sound encoded in the file. The only difference between WAV and AIFF format is the way in which the number series is written to the file. The quality, resolution, and information contained in the two file types are identical. WAV and AIFF files are both raw audio data file types, as opposed to compressed audio data file types such as MP3, M4A, and WMA file types which use numeric algorithms to reproduce approximations to the original raw audio data. Uncompressed file types offer the truest digital audio reproduction, so either WAV or AIFF files can be used with equally good results.
Send us your current track with any mixing work you may have done on it already and we'll provide free feedback on what we think can be done to make it sound its best, plus a price quote to have us provide the services to get it there. No obligation to purchase services.
Entry January 7, 2014:
"I heard that I am supposed to remove all compression plugins from my mix before sending it in for mastering. Is this true?"
Not exactly. You should definitely remove any compression, limiting, maximizing, and/or EQ adjustments you've added to the Master Output of your mix. However, you should leave in compression that you used for any individual channel tracks or as auxiliary send effects or group channel effects as you probably used these in order to control dynamics, balance levels, and perhaps to obtain a particular sonic flavor. You don't want to add these to the master output channel, though, in order to maximize the flexibility for your mastering engineer to add them in to the overall master mixdown of the track. Remember, if you're using a compression, limiting, or maximizing plug-in on your master output channel of your mix in order to bring the volume up for mix checking purposes you may need to reduce the master channel fader level when you remove these plug-ins to avoid clipping distortion when you create your mixdown track to supply to your mastering studio.Entry November 19, 2013:
"What is Dithering and should I dither my audio track I send in for mastering?"
Dithering is a method of smoothing out "ghost" artefacts introduced into digital audio data as a result of the conversion of continuous audio waveforms into segmented digital data points. This is especially important when downsampling from a higher bit depth recording, such as when an audio track is downsampled from a 24-bit original audio file to a 16-bit Redbook Standard audio file, as the downconversion process can add additional artificial information on top of any existing original artificial information due to the conversion from the analog "raw" signal to digital data. The smoothing process is, at its most basic description, a way of randomizing or mixing up the lowest place values in the digital number streams.Since you usually want to provide the highest bit depth original audio mixdown file you can without downsampling it ahead of time, and since the mastering process at any professional mastering studio will always include dithering at the final downsampling step of the process to set the audio track according to Redbook Standard, it's not necessary to dither your audio track to send in for mastering.
Entry September 25, 2013:
"If I have to choose between Mixing OR Mastering, which is best?"
It's surprising how often we get asked this question. It's basically like asking, "If I have to choose between having wheels or an engine in my car, which should I choose?". Clearly in order to have a fully functional car you need both. In the same way in order to have a fully produced and finished track you would need to have it both mixed AND mastered. However, having said that, if for reasons unknown you were forced to choose one or the other in our example scenario with the car, most of us would choose wheels since there's no point in having an engine if the car can't even roll. Similarly, if for reasons unknown you would need to choose between mixing and mastering for your track you should choose mixing since there's no reason to master and unmixed song (unless it was a live mix or simple mono or stereo recording for which mixing isn't even applicable). There's not much of a discussion on this one since you really need both, but hopefully this post will help put the question to rest.Entry June 17, 2013:
"What's the best way to do a radio edit version of my track?"
The answer to that question has three parts. First, if you need to make any edits to your vocals due to lyrics that are inappropriate for wide audience broadcast (i.e. censoring of language not appropriate for all audiences) the best way to do this is within the mix session prior to mastering. If you wait and ask your mastering facility to provide you with an edited version they will have to censor the entire track, including the beat/instrumentation, during any editing work. If you make the edits within the mix session you can censor only the vocal track responsible and leave all other tracks untouched. Doing this you can then provide your mastering facility with two variations of your final mixed track: one with edits and one without. If you want your mastering or post-production facility to do the editing/censoring for you, plan on providing them with separate tracks for the beat/instrumentation and vocals so that they can do the edits without affecting the instrument sounds. The second part of the answer is related to how you make your edits or do your censoring. The quickest and easiest way is to simply mute or delete the short section of lyrics whenever an inappropriate word appears in your mix. Be sure to save your clean mix session under a new file name so you don't lose your complete original unedited mix session. Another popular method of censoring is to reverse the offending lyrics or use doppler-shifting (pitch bending) and quick fade-outs to give a DJ-style quick stop to the lyrics as you hear them appear, without hearing the full word. You could also replace the censored lyrics with a sound effect clip. The third and final part of the answer to this question is related to the length of the track. Radio play often requires tracks under 4 minutes in length so you may need to edit your track for length in addition to, or instead of, censoring lyrics. If you have a long intro or outro, consider trimming those down to make a shorter radio-edited version of the track. If your track has any kind of bridge or instrumental breakdown section, those may be easy things to remove as well to get your time within the 4-minute limit. If you have a very long track you may need to consider removing a verse, too. In the end, keep in mind that you want a fast-paced song (even if it's a "slow" song) that doesn't drag on too long and has lyrics appropriate for all ages as this will ensure the broadest possible audience for radio play and therefore increase your chances of getting air time.Entry October 25, 2012:
"Which is better - analog or digital?"
That's a difficult question to answer. Probably the best thing to do is simply be aware of the differences between them and then choose which one seems best to you for your situation. The primary difference between analog and digital is that analog provides a continuous waveform whereas digital provides a segmented waveform broken up into digital bits. You may think this means that analog is then obviously better, but that's not necessarily always the case. In particular, because of the way digital information works, it's almost always extremely accurate and has very low noise added to it, while analog signals are much more susceptible to added electronic and static noise. In addition, you must use hardware using standard electronic technology, not integrated circuit technology, to process analog sounds, so you miss out on all possibilities of using digital technology circuitry, including any computer software. Also, our brain can only process sound information so fast, so it's arguable that even digitally segmented waveforms sound like they are continuous analog waveforms to our brains as long as the sample rate and bit depth are sufficiently detailed. These three factors make it possible for some to say digital is actually preferrable over analog. Often times when people speak of analog versus digital in terms of music, they mean the feeling that results from the processors. If you've made efforts to use analog recording tools (i.e. tape) then it would probably be in your best interests to also have mixing and mastering done with analog tools to maintain that same feeling in the sound. If you've done digital recording but would like some analog feeling in your sound you may achieve results that are just as good if you ask your mixing and/or mastering engineer to apply digital EQ settings that model analog sounds.Entry September 19, 2012:
"Why do I need to send a WAV file for mastering when everyone is always using M4A's and MP3's and other smaller file types for easier and faster online streaming and downloading?"
Okay, fair question. Basically the bottom line here is that you should give your mastering engineer the best possible quality material so that he can have all the details available to his ear at the fullest resolution. This helps in making fine detail decisions in the mastering work which may not be heard if he only has an mp3 or other compressed file format to work with from the start instead of the full uncompressed wav file. If an mp3 or m4a version of the mastered track is created at the very end of the process, that version will contain as much of the final information as it can carry within its compressed format, which may potentially include hints of those adjustments made during mastering using the original WAV file. If the engineer only had an mp3 to start with he may not have made those same adjustments since he might not hear all those details in the sound due to the reduced quality format, and so you wouldn't be getting any of those fine details at all in the final master version - not even a hint of them.There's also the fact that you may find yourself in a position of wanting to have the high quality wav version to use at some future time and you can't back pedal to wav quality from an mp3 master made from an mp3 original, but you CAN back pedal to a wav quality master if you have an mp3 master made from a wav file original, because presumably somewhere you will have set aside the wav file mastered version that your mastering studio sent you and which was used to create the mp3 master you may be using currently.
Lossless m4a files would be a better choice than mp3 files, but if you use a high bit depth and sample rate then the file size can still be nearly as large and you still can't guarantee perfect reproduction of the sound unless you're using an original unaltered wav or aiff bounce of the mix.
Entry August 13, 2012:
"What are ISRC codes and do I need them?"
The best answer is direct from the usisrc.org web page:The ISRC (International Standard Recording Code) is the international identification system for sound recordings and music video recordings. Each ISRC is a unique and permanent identifier for a specific recording, independent of the format on which it appears (CD, audio file, etc) or the rights holders involved. Only one ISRC should be issued to a track, and an ISRC can never represent more than one unique recording. ISRCs are widely used in digital commerce by download sites and collecting societies. An ISRC can also be permanently encoded into a product as its digital fingerprint. Encoded ISRC provide the means to automatically identify recordings for royalty payments.If you plan to have your material distributed digitally (iTunes, Spotify, Pandora, etc.) then an ISRC code is required. The good news is that every digital distribution provider (CD Baby, TuneCore, etc.) and many duplication providers will provide you with ISRC codes for the digitally distributed tracks so you don't have to do anything.
If you plan to make physical CDs to be distributed internationally we highly recommend also having ISRC codes written to the CD files as well as the digital file versions. This may mean purchasing your own ISRC codes from usisrc.org and providing those codes to your mastering facility to be added to your mastered tracks and Master CD.
If you're not in one of these categories then ISRC codes are not necessary for you.
Entry June 25, 2012:
"My Mastering Studio wants me to turn off my master compression and maximizing plugins and turn down the master levels, but won't that make my music sound too quiet?!?!"
Excellent question! This is probably the single most important question in regards to preparing your mixes to send in for final mastering. The simple and most clear answer is "LET YOUR MASTERING STUDIO SET YOUR FINAL VOLUME LEVELS FOR YOU". This is what mastering engineers are trained to do and what they do best. If you try to make the sound loud in the mix you are removing the ability of the mastering engineer to raise your levels in a way that sounds clean, clear, punchy, and professional. In your mix you should focus on getting a good blend of sounds, proper EQ and effects use, and make it the right overall flavor for your genre, but don't worry about pumping up the overall volume level. Give the mix to the mastering studio with plenty of dynamics and volume headroom in it. What you'll get back will be strong, loud, and clear, and professional sounding.Entry May 25, 2012:
"What's the right amount of reverb to use in my mixes?"
There's actually two answers to this question. The first answer is that if you are mixing music that you wrote or produced then the right amount of reverb is the amount that you (the writer/producer/composer) decide is required for the song. After all music is an artform and so the interpretation of it is the right of the artist to determine for his or herself. Now having said that, the second answer is the technical answer which is that you should use enough to blend the parts together into your mix so that they create a coherent sense of space that matches the soundstage that you aim to create in the stereo field. Generally you do this by fine-tuning the various reverb settings (eq filters, decay time, reflective space size, etc.) and then dial up the percentage of application to each part in your mix until it feels like it's sitting together spatially with other similar parts in the mix. Another option is to utilize an old audio engineer addage, which is to turn it up until you just start to notice its effects and then turn it back down "one click" from that point. This way it's in there, but not something you notice as an "effect", but rather something that adds to the feeling of space.Entry March 28, 2012:
"Why do I hear a hissing sound in my recordings and what can I do about it?"
If this sounds like you then you probably are picking up background noise in your mic recording. Microphones will pick up any sounds that they encounter, not just the sound source it may be aimed at. That means any ambient sounds (background noise) will also be recorded along with the desired sound. There are a few steps you can take that usually eliminate the background noise issue in most recordings. First, and most obviously, make sure there are no unnecessary sources of sound in the space where you are recording. This means turn off unnecessary fans, heat, A/C, electronic devices, computers, and anything else that could potentially produce noise - even if that noise seems extremely quiet. Second, make sure you're using the correct microphone or mic setting for your recording. Many mics are omnidirectional, meaning they pick up sound in all directions, but if what you are recording only produces sound from a single point, such as vocals or a small instrument, then you may be picking up a lot of unwanted ambient noise using an omnidirectional mic. If possible, try using a cardiod or hypercardiod pattern mic instead as these confine the area of sound pick-up to only what is coming directly toward the face of the mic. Third, make sure the microphone is placed an appropriate distance from the desired sound source. If you have your microphone too far from the sound source you will need to turn up your preamp and/or input gain and this can sometimes allow the mic to more strongly pickup ambient sound or even add electronic noise from the preamp or input device itself if you have to turn either one up significantly. Place the microphone at a distance that isn't so close that you end up with overdriven recording levels or extreme variation in sound due to the source moving around, but is close enough that you don't need to amplify the sound so strongly. Remember, when you turn up the preamp and input gain you are also turning up the level of the background noise in your recording. If you do these first three steps, which are the simplest steps to take, and you still find you have noise problems in your recordings then there are two additional steps you can take that can also help. The first additional step is to address your room acoustics and sound isolation. Is it possible you're picking up noise from outside your recording space due to the fact that your walls are not insulated and the doors are not solid doors that seal tight? Is it possible that the noise you're hearing is actually room reflection sound that's reverberating and echoing in the space because all the surfaces are flat, hard, and reflective to the sound? Examine your space critically and decide if you need to add some sound isolation measures to better seal off the space from the outside world and/or if you may need to add some interior acoustic materials to help reduce echo, reflection, and reverberation. Along with the first three steps this can very greatly improve the overall quality of your sound. The second additional step is to consider choosing a different microphone, preamp, and/or recording interface. One or more of these may be old or defective or "cheap". If so, it's possible they are adding electronic hiss and other noise in your recordings. Many people make the mistake of taking the recording equipment replacement step first, but it's usually unnecessary. Most often the noise is an ambient noise issue rather than recording equipment noise issue. First address the three "easy" steps and then try the room acoustics step and then, if there is still an issue, try the recording equipment step. The reason for this is that if you have an ambient noise issue then adding improved recording equipment will simply do a better job at picking up that ambient noise and you may actually be worse off for your investment. Leave this step until last and then, if it turns out to be a necessary step, you will have solved the issue AND removed your ambient noise sources, thus providing you with even more pristine results.Entry December 21, 2011:
Do I need to set my levels to -6dB or -3dB or 0dB for mastering? What is the rule for this?
Many mastering facilities require that you provide your originals at -3dB or -6dB levels. This is to ensure that there is sufficient volume headroom for working with during mastering and to help avoid the possibility of clipped peaks in your tracks. The exact dB reduction is based on historical values for analog equipment, but it still holds true that for most mixes if you set the master levels at -6dB you usually avoid clipping in the mixdown. In reality this is just a guide to assist you with keeping your mixes clean and not overdriven. If you are confident that none of your individual component tracks have overdriven levels and you haven't overused compression/limiting/maximizing effects on your master bus then you can actually set your master levels as high as you want AS LONG AS YOU AVOID CLIPPING. In other words, set the master channel fader to whatever level keeps the master output volume level under "the red" throughout the full length of the track. Follow this general guideline and your mixdown levels will always be ready for mastering.
ONLINE MIXING ORDER ![]()
Entry September 18, 2011:
How do I know if I need mixing or mastering?
You may find yourself in a situation where you've done your recording and some editing and mixing work, but you feel like it still doesn't sound as full or finished as you know it could. You're probably wondering whether there are additional mix adjustments that need to be made or if perhaps everything that needs to be done to finish it will be done in mastering. There's a few things you can check to help see whether you need more mixing or if you're ready for mastering. If you feel like the overall volume level isn't there or the song doesn't feel spacious enough or it's missing some punch and sparkle or it's just not quite crispy sounding overall then most likely your mix is good now and you're ready for mastering since all these aspects are attended to in the mastering process. If, on the other hand, you feel like there are parts in the track that are getting buried or lost in the sound or there's some clarity issues in particular voices or other elements or there are some effects you think need to be added to certain pieces of the song, these kinds of adjustments require you to do work in the mix since they involve changing individual elements in the song. Mastering is the work done on the master output channel, the full bounced-down/mixed-down song, so when we're thinking of mastering we're thinking of the overall feeling and volume level of the track as a whole, not the flavor and levels of individual parts within it. If you determine there are any inidividual parts within the track that may still need attention then you need some level of mixing work before mastering. If there are no particular individual elements that need attention, but it's the song as a whole that needs attention, then you can safely say that you're ready for mastering.Entry July 28, 2011:
Short video explanation about audio clipping
Entry June 29, 2011:
How can I avoid getting clicks in my music tracks after I make edits?
Clicks occur after editing in your mixes most commonly due to edit points not being at zero amplitude. What this means is that you've selected a segment in your mix that has some degree of positive or negative waveform amplitude at the very first and/or last sample point of your selection. If the amplitudes of the first and last samples of your selection are not similar to the samples that occur just before or after it in the mix channel track then you will see a sudden jump in waveform amplitude going into and/or out of the edited selection. This is heard as a "pop" or "click" in your sound. There are two ways to avoid this: 1. Make sure your selections for editing are chosen at start and stop sample points ocurring at or near zero amplitude (some mix workstations include a "snap to zero amplitude" function to assist with this) or 2. Do a very fast fade-in/out at the leading and trailing edges of your edit region and the regions to either side of it in your mix track to smooth out transitions.
Entry June 16, 2011:
What sample rate and bit depth should I use for my recordings?
Sample rate is the number of times the audio information is sampled from the incoming sound per second, listed in Hertz (1Hz = 1 time per second) or kiloHertz (1kHz = 1000 times per second). Bit depth is the digital segmentation of the signal level - the greater the bit depth the more detailed its segmentation, which means a more accurate representation of the original signal in digital form. So, from these definitions you may think that it's best to use the highest sample rate and bit depth possible on your system, which on most newer systems is either 24-bit/96kHz or even 32-bit/192kHz. However, there are two things to keep in mind: 1. Higher sample rates and bit depths mean larger file sizes which can potentially make some mixes unwieldy in size and 2. If your final goal is an Audio CD then your sample rates and bit depths will be reduced to 16-bit/44.1kHz during the mastering process per redbook audio standards, and if you're planning on releasing your tracks as digital downloads (mp3, m4a, etc.) then the final sample rates and bit depths could be even lower than this. With these things in mind it's easy to see there are diminishing returns for setting your sample rate and bit depth much higher than the redbook audio standard of 16-bit/44.1kHz. However, there is something to be said for capturing an accurate representation of your sound to assist with better mixing and mastering. As such, it is our recommendation that you follow the guideline of "one step higher than baseline". By this we mean set your recording sample rate to one step higher than redbook standard 44.1kHz - usually this means 48kHz, and set your bit depth one step higher than redbook standard 16-bit - usually this means 24-bit. Doing your recording and mixing at 24-bit/48kHz and providing a 24-bit/48kHz stereo wav file for mastering will allow for higher than baseline level resolution, but not go overboard in file size for something that will ultimately need to be reduced to 16-bit/44.1kHz as a final step. Doing your recording, mixing, and mastering at 16-bit/44.1kHz is also quite acceptable.
Entry May 27, 2011:
What file types are the best for audio recordings?
The best file types are WAV and AIFF. If you can do all your recording, mixing, and mastering using either of these file types you'll achieve the best results. DON'T assume that converting an MP3 or WMA file to WAV or AIFF format will give you the same results, though. The final quality level is only as good as the lowest quality step in the audio chain. So if you used MP3 audio tracks or converted your material to MP3 format at any point in the process you will achieve MP3 quality results regardless of whether or not you later convert to WAV or AIFF format. Bottom line - maintain WAV or AIFF format through every step of the digital audio process: recording, mixing, and mastering.